44 inches (1.2 metres) in length may, to some modellers, seem to be pushing the size of
your latest creation, but that 44 inches is just what David Sisson had in mind when
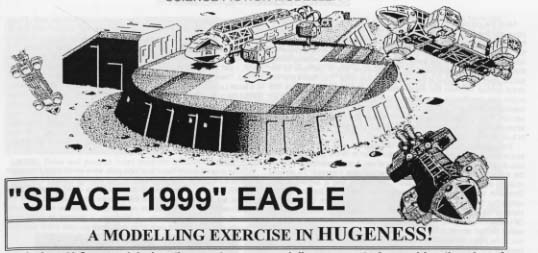
constructing an exact replica of Moonbase Alpha's "workhorse" spacecraft. After all, this was
the precise size of the largest of four scales of the EAGLE, 44", 22", 11" and 5.5", that the
FX crew used for the model filming and, being an avid fan of the design since first seeing
"Space 1999" in the late 70s, David, who lives in Nottingham in England, just couldn't resist
the temptation! (Article and photos by David Sisson.)
I began building model kits when I was nine years of age, most of them
being WWII aircraft. After several years my bedroom was filled with every
type of Spitfire that was available, as well as some that I had modified from
others. The Spitfire was my first love - she has fantastic lines and sounds
wonderful and is the best plane at any airshow. Then, in 1975, I first saw
"Space 1999" and I'm afraid that all the aircraft models ended up in the
attic so that my bedroom could fill up with EAGLES. Unfortunately, the big
difference between the Spitfire and the EAGLE is that you can buy many
good plastic kits of the Spit', but Airfix rather let us down with the EAGLE
model - what a crap kit! What a rip-off!
I spent a lot of time on the EAGLE kits, adding extra detailing, cutting
out the girderwork and each one I built managed to be a little less awful
than the previous one! Then, in 1980, I saw the original 44 inch long studio
version for the first time. After drooling over it for about an hour, I returned
home and threw all my EAGLE kits into the attic. I decided that, one day, I
would build an EAGLE just like the one I had seen. But I realised that, at
that time, I wasn't anywhere good enough to start, so I decided to
practise by building a few Thunderbird models. Ten years later, I thought I
was good enough to begin - so I did.
The first thing I needed was a decent blueprint and there is one in the
old Gerry Anderson magazine, S.I.G. #10. This blueprint, drawn by Phil
Rae, is very good because firstly, Phil can draw and secondly, the original
model is part of his mammoth collection. However, I didn't want to build a
model using this drawing because errors were bound to crop up if I scaled
it up to the required large size. With Phil's kind permission, I was able to
take a series of measurements from the model to draw up my plans,
although after a short while, I realised that as the EAGLE is a modular
design with a lot of repeated patterns, it was only necessary to blueprint a
couple of small areas and the rest could just be built straight from my
measurements.
I could have started on virtually any part of the model but building the
basic frame seemed to be the most obvious thing to do. So the first job
was trying to decide how much brass pipe I needed to buy. Most of the
pipe on the original model is 1/4 inch diameter, with a fair amount of 3/16"
and a little bit of 5/16". My average estimate came out at 90 feet of pipe
which is rather a lot to get hold of. Years earlier I had built a smaller
EAGLE and all the brass was bought from model shops where a few tiny
lengths can cost a fortune. So this time I looked in the Yellow Pages under
Non-Ferrous Metal Stockists and eventually located a supplier on a local |
industrial estate. It was quite a pleasant change to buy the stuff more
cheaply and then have someone thrusting spare six foot lengths of brass at
me with the words, "You might as well take it mate," because they couldn't
be bothered to price it up!
Safely back home with my hundred and something feet of brass, I sat at
my workbench and began - that is I began to wonder how I was going to fix
it all together. The first time I had built an EAGLE I did it the hard way -
cutting all the pipes to the correct lengths and then trying to solder it all
together - wrong! The smart and easy way is to cut the horizontal lengths
longer than required so the extra bits can be used to help support the
assembly. The framework basically breaks down into three sections - the
main top frame and the two mid-sections that the rest of the model hangs
onto Tackling one of these mid-sections first, I took a piece of 2mm
plasticard and drew out the cross-sectional shape required, then carefully
drilled eight 1/4 inch holes. When I was satisfied with the positioning of
these holes, a duplicate was made and the two pieces were carefully
positioned about seven inches apart. Eight lengths of 1/4 inch brass were
then pushed throught the holes, forming the exact shape needed. Now, I
just had to cut all the connecting pieces to length and solder it all together.
It sounds simple, but it was a lot of hard work and there was a problem
straight away.
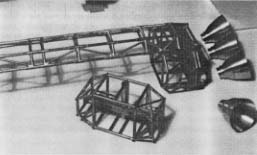
ABOVE: The basic fame of the EAGLE being soldered together. |
|
