Sci-Fi & Fantasy Models
Sci-Fi and Fantasy Models Number 12 p14-19
Scanned by Paulo Jorge Morgado
PART ONE | PART TWO
It may seem like travelling back a long way through time to cover models built for a show that went into production in 1974, but it was that TV show that started me in my professional career as an independent model maker and designer. So with BBC TV and Satellite both either about to, or already rerunning the show, the time seems ripe to return to the beginning of 1974.
For its time Space: 1999 was a very high budget show and a good part of that budget went into producing what were considered then, and indeed now, some pretty stunning special effects. This was solely down to the team effort of the special effects crew headed by Brian Johnson (Johncock on the credits of Thunderbirds) and Nick Allder at Bray Studios near Windsor (formerly, of course, the home of Hammer horror films!)
In some respects I was the odd one out on the team because I alone worked in my own studios, which at that time consisted of a converted tractor barn at Woldingham in Surrey. Woldingham is 50 miles from Bray and even then was a good 1 hour journey which I made about once every 10 days to deliver models and collect scripts ready for each next episode, as the show was made on what is called a "10 day turnaround"; meaning an episode was filmed every 10 days.
But to answer the question, - I simply (simply?!?!) wrote to every film company I could find and asked them if they needed any models built. When I didn't get a single response I got in my car with my. portfolio of photos and went knocking on doors! This bought me the odd job - like making signs for a PG Tips Chimps advert... (the first thing I ever did for TV). But then a friend showed me a tiny cutting from a newspaper saying that a new TV series called Space: 1999 was going into production, so I wrote to the studios and was told to go and see Brian Johnson at Bray. Brian saw my photos, and my car load of models and, pointing at a huge grey "thing" that was to eventually become known as the "Battlecruiser", said "take that out, I'd like to have a look". When he then turned to me and said "Would you mind if I shot some test footage right now of this model?" I was flabbergasted - and I was off on a career in TV/Film model making!
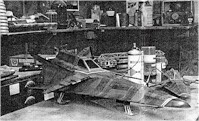 The two scales of Glider are clearly evident in this shot. Note the 44" Eagle in background |
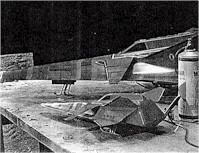 Shot shows how two scales of the same model had to be built for various shots |
| For its final appearance in the episode The Last Enemy, it was transformed into another ship by cannibalising models I'd already built for earlier episodes. I had built a space station for the graveyard sequence in Dragon's Domain from two plastic neon strip light covers, detailed with the runners from the Airfix "travelling crane" kit. However, these covers had already been used to make a lunar station many years earlier. That lunar station was taken apart, two of its "arms" removed and stuck back to back to form the basis of the Dragon's Domain station. Now this same space station was stuck onto the front of the Battlecruiser, along with another smaller satellite model I'd also built previously, in place of the spherical command module. The whole thing was then sprayed yellow! So it can be seen how maximum use was made of the models and that by clever rearranging they could appear as entirely different ships.
|
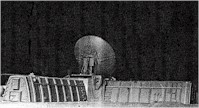 The Lunar Station that became the Dragon's Domain space station but eventually became the new front of the Battlecruiser for The Last Enemy
|
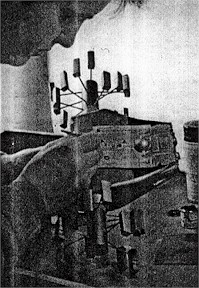 Martin works on 14" Gwent model |
Oh, and before I move on - yes, I did get the Alpha Child ships finished on time but there wasn't half a lot of late nights involved! If you were to ask the SFX crew (and Nick Allder in particular), which model holds the least happy memories I think it is fair to say everyone would chorus Gwent! At that time it was not the name of a Welsh county but the name inexplicably given to a vast machine, supposedly a quarter of a mile, across, which resembled a crab on two sets of rotating legs. It spoke with actor Leo McKern's voice, and appeared in the episode The Infernal Machine. It too was built in hardboard by the steaming technique already mentioned, around a motorised aluminium tube built by Nick. However it wasn't so much the building of it that was the problem. To me it was much like most of the other models. It was filming the damn thing! Imagine trying to get a realistic shot of this craft, doing a rolling take off across the lunar landscape. I won't go into the sordid details involved in lifting this very heavy 5' wide model smoothly into the air (hang on - there's no air on the moon!) but suffice it to say that at the end of filming, Nick picked the model up bodily and threw it across the studio in shear frustration! Still, looking on the bright side, I did a 14" wide model for long shots and that survived okay!
|
It would become tedious for me to recite here how every single model for Space: 1999 was built, so out of the 86 models I did altogether for both series, I will single out certain ones in order to define all the different techniques I employed during nearly 3 years on the show.
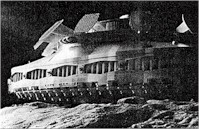 One day was given to come up with this 4' ship |
My normal routine was, as I've already said, to do the models for each show within 10 days to fit the filming schedule. However, this was very difficult, even allowing for the fact I worked 12-18 hours a day 7 days a week! With the odd "ghoster' thrown in (this is a film industry term for working right though the day, through the night and then through the next day without a sleep break). So Brian always gave me extra time whenever possible. Some shows took longer to shoot than others because of the different number of SFX shots required for different episodes. Compare Dragon's Domain (many people's favourite episode) with The Rules Of Luton in series 2, (nearly everybody's least favourite episode!) which had virtually no model shots in it at all. For me this therefore meant that sometimes I had my modelling time extended to 3 or 4 weeks. |
| In fact Dragon's Domain is an ideal episode to demonstrate the number of models needed to film just one craft. The Ultra Probe is only one craft in the storyline, yet 3 models of it were built to get all the shots required. These were a 6' version, for general shots such as the model flying past the camera, a 3' version for long shots, and a large command module section (built to the same scale as the 44' Eagle), for close ups, this latter model having all the working bits including moving sprung clamp arms and opening hatches.
I had recently seen the film Silent Running, (made by Brian Johnson's friend and colleague Doug Trumbull). With the undocking of the Ultra Probe I wanted to recreate something like the scenes in that film where the domes undock from the Valley Forge. To achieve the "glitter" effect - seen as lots of WW pieces of debris spurt out- of the hatches as they are blown, Brian used the same technique as Doug Trumbull. Silica from the element of an old electric toaster was broken up into minute fragments and blown out through the open hatches with compressed air! If you want to know where the idea for this effect came from just look at newsreel footage of the real Lunar Module blasting off from the moon! The Ultra Probe models were highly detailed and employed EMA tubing and piping for virtually their entire basic shapes. (I'd discovered it by then!) The girder work on the Eagles was done in brass for shear strength, but the design of the Ultra Probe meant I could get away with plastic piping for its girder work. The jet exhausts were turned on a lathe in aluminium just as the Eagle's jets were. The front of the command module was based on the design of the Eagle's nose, so I had to make a wooden pattern and press mould this in 2 halves in Perspex sheeting. Unfortunately I could not get access to a 44" or 22" Eagle to get a casting to convert as these were in constant use at the studios, so I had to start from scratch. Both the 6' and the large Command Module section noses where done in this way and corresponded in scale to the 22" and 44" Eagles, however the smaller 3' model had a solid wood command module. |
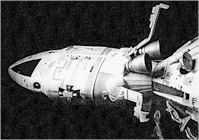 Large scale Ultra Probe in scale with 44" Eagles with hatches and clamps open
|
The panel cladding on my models and on the Eagles was done by simply making two sets of pressings from the original wooden masters. The first two halves were stuck together after having had, the window areas cut out and panelled in, and then the second pressings were cut out individually and fitted over the first basic shape. This was a very time consuming process as the cladding had to be cut out very accurately and aligned perfectly.
All photographs copyright Martin Bower, unless stated!
Space:1999 Copyright ITC Entertainment Group Ltd.