Moonbase Guide
Research
by Craig Rohloff
The second season of Space: 1999 featured many changes making it an almost completely different series from season one... so much so that I consider them to be two separate series altogether. Story plots became less esoteric/mysterious and more action-oriented. Characters disappeared and were replaced by new ones - all without explanation - and remaining characters changed a bit from their earlier incarnations. Uniforms became more varied and colourful (so no longer 'uniform' as the very name implicitly demands). The sets became smaller, with design elements such as computer panels and even signage altered.
Nevertheless, there were some Series Two sets that looked as though they would work within the Series One version of Moonbase Alpha. Obviously, this is in no small way due to Keith Wilson's modular set design, which had been created with modular pieces that could be arranged and rearranged as needed. But as mentioned above, elements within those modules had change between the two seasons, but in my mind's eye, could just as easily be changed back.
The point (at last) is that some rooms in Series 2 Alpha would work well in Series 1 Alpha. This particular essay is about the Research Lab that appeared in Series 2's second episode, The Exiles
During the course of the story, Alphans find a fleet of capsules that contain humanoid aliens who profess being able to help the Alphans modify their life support system if only they would rescue the entire fleet; turns out that the aliens are actually malevolent criminals intent on taking over Alpha for themselves and exacting revenge on their homeworld that exiled them in the first place.
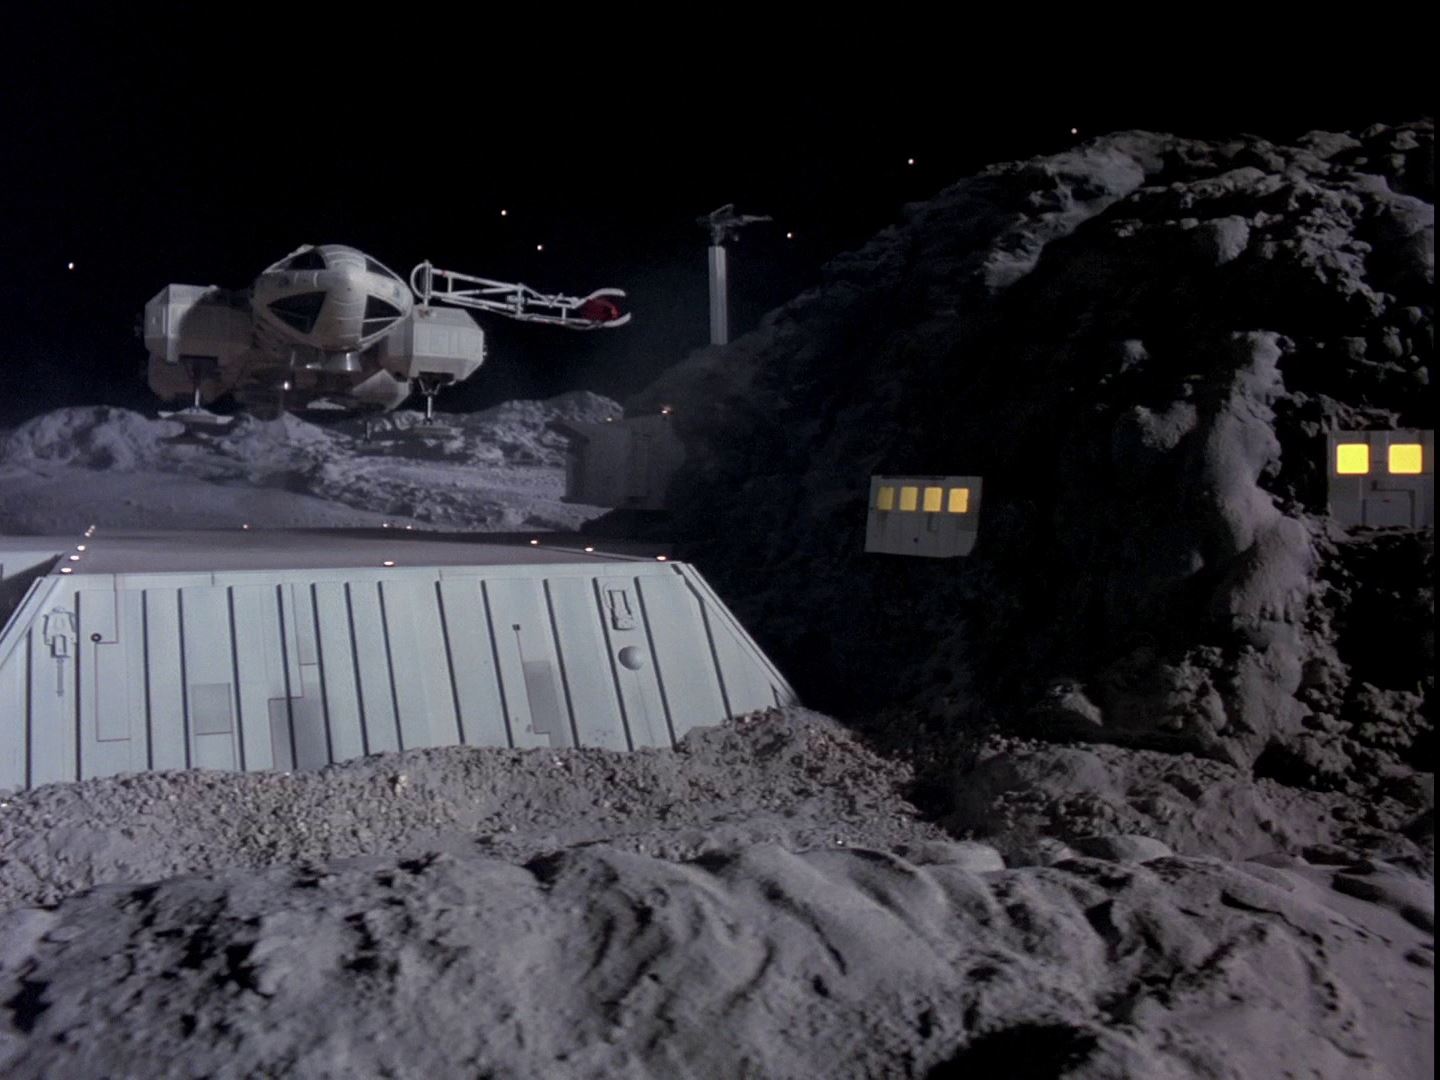
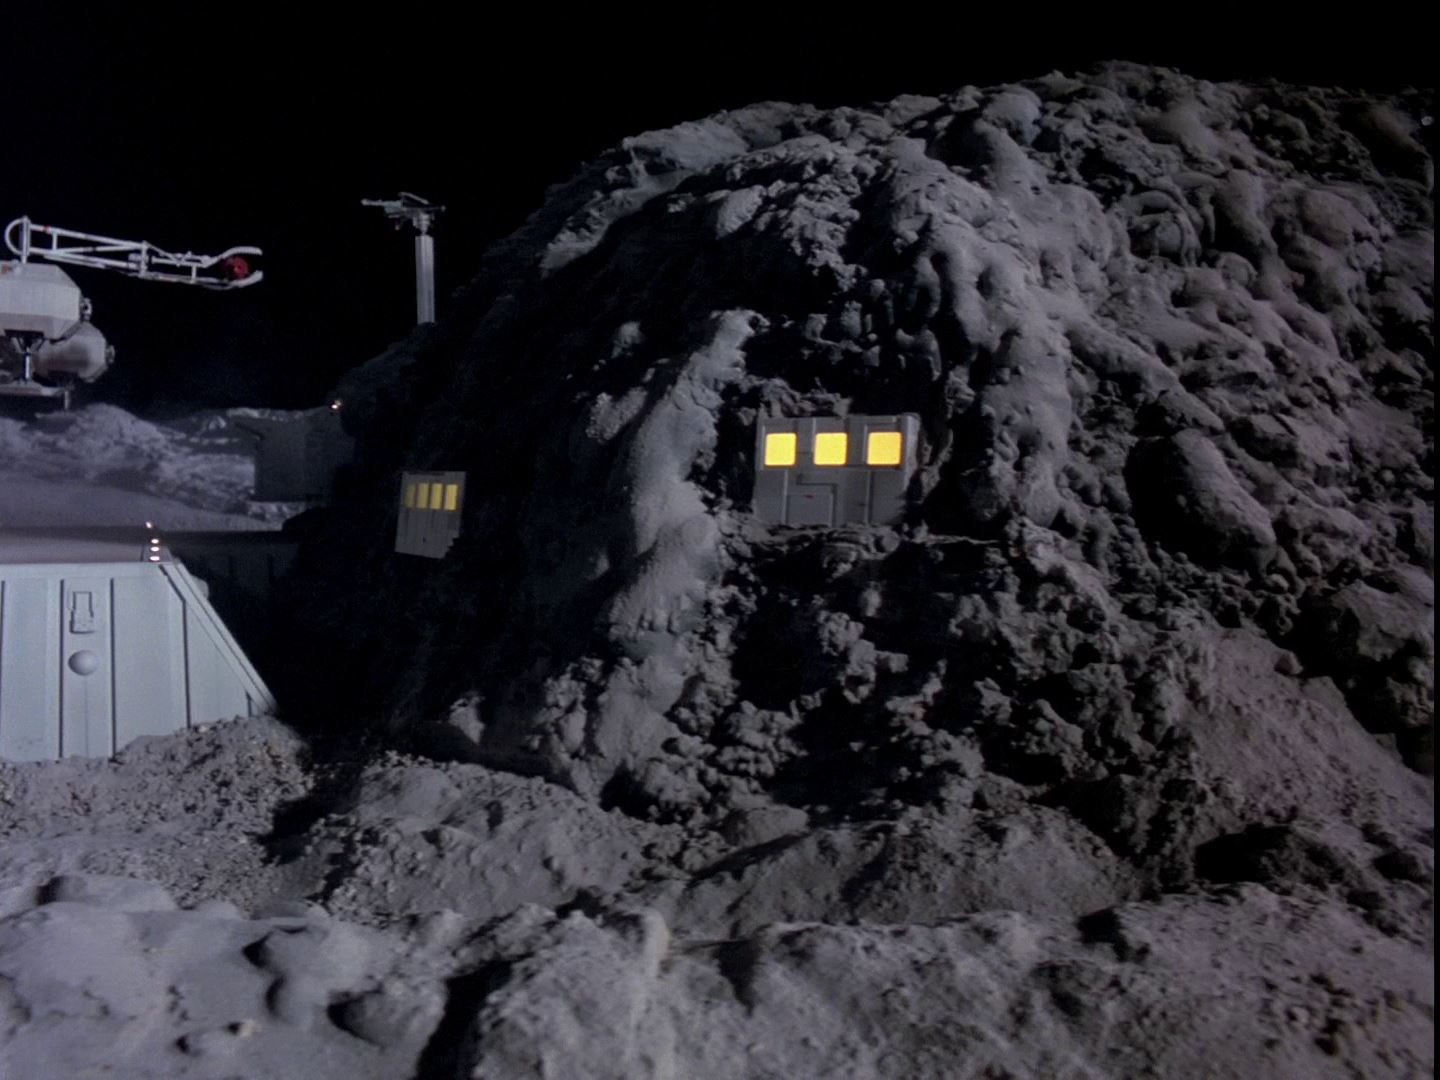
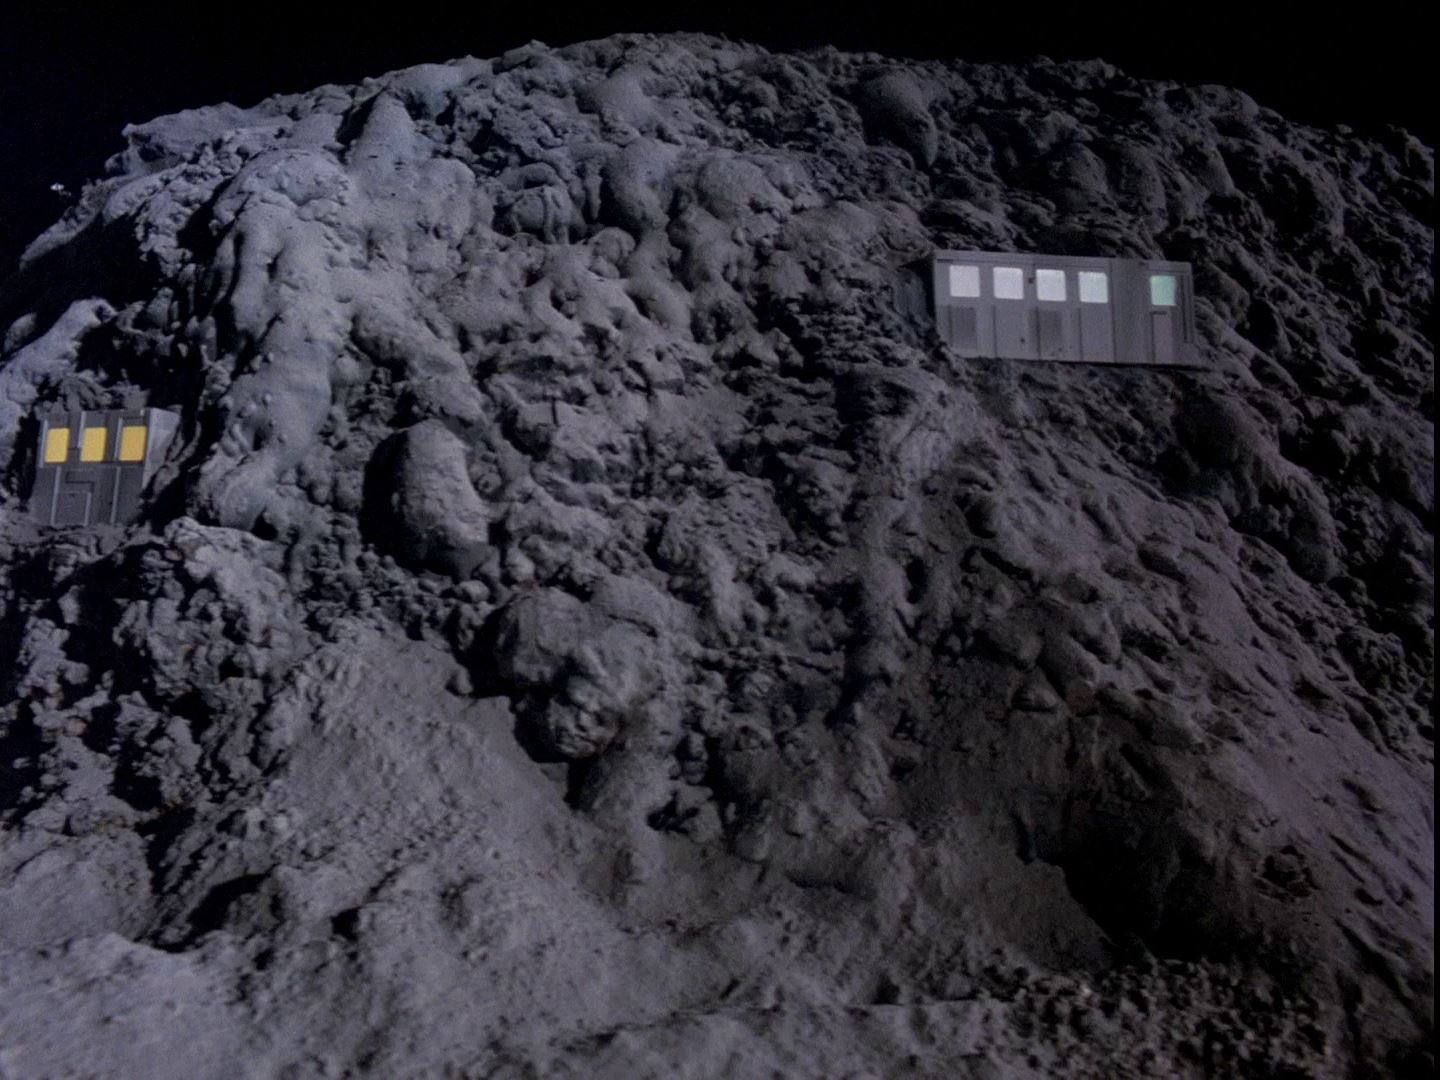
A good point about this episode is that when the first capsule is retrieved from lunar orbit and brought to Alpha, it is not brought to the main base, but rather landed at a more distant isolated research lab some distance from the base. This allows the capsule (or for that matter, any other foreign object) to be analysed in isolation from the main part of Alpha, reducing potential risks to the population. Built into a small lunar hill, the surface portion of the lab consists of a small T-shaped landing pad and boarding tube with a few surface windows built into the side of the hill. An antenna mast sticks up from the hill.

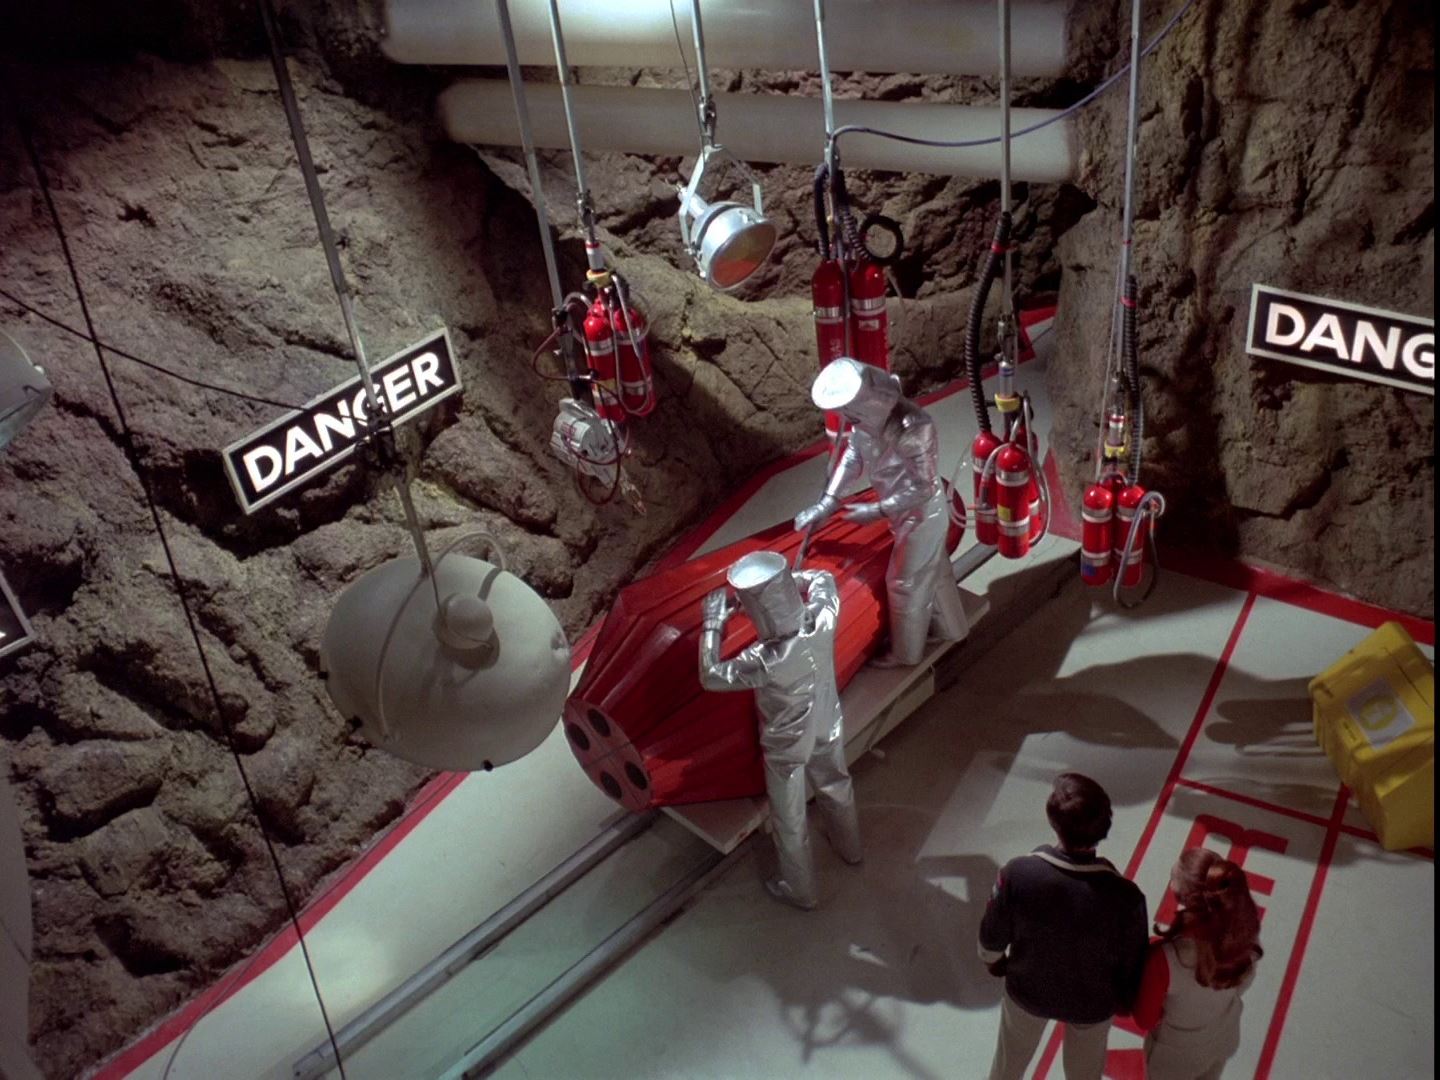
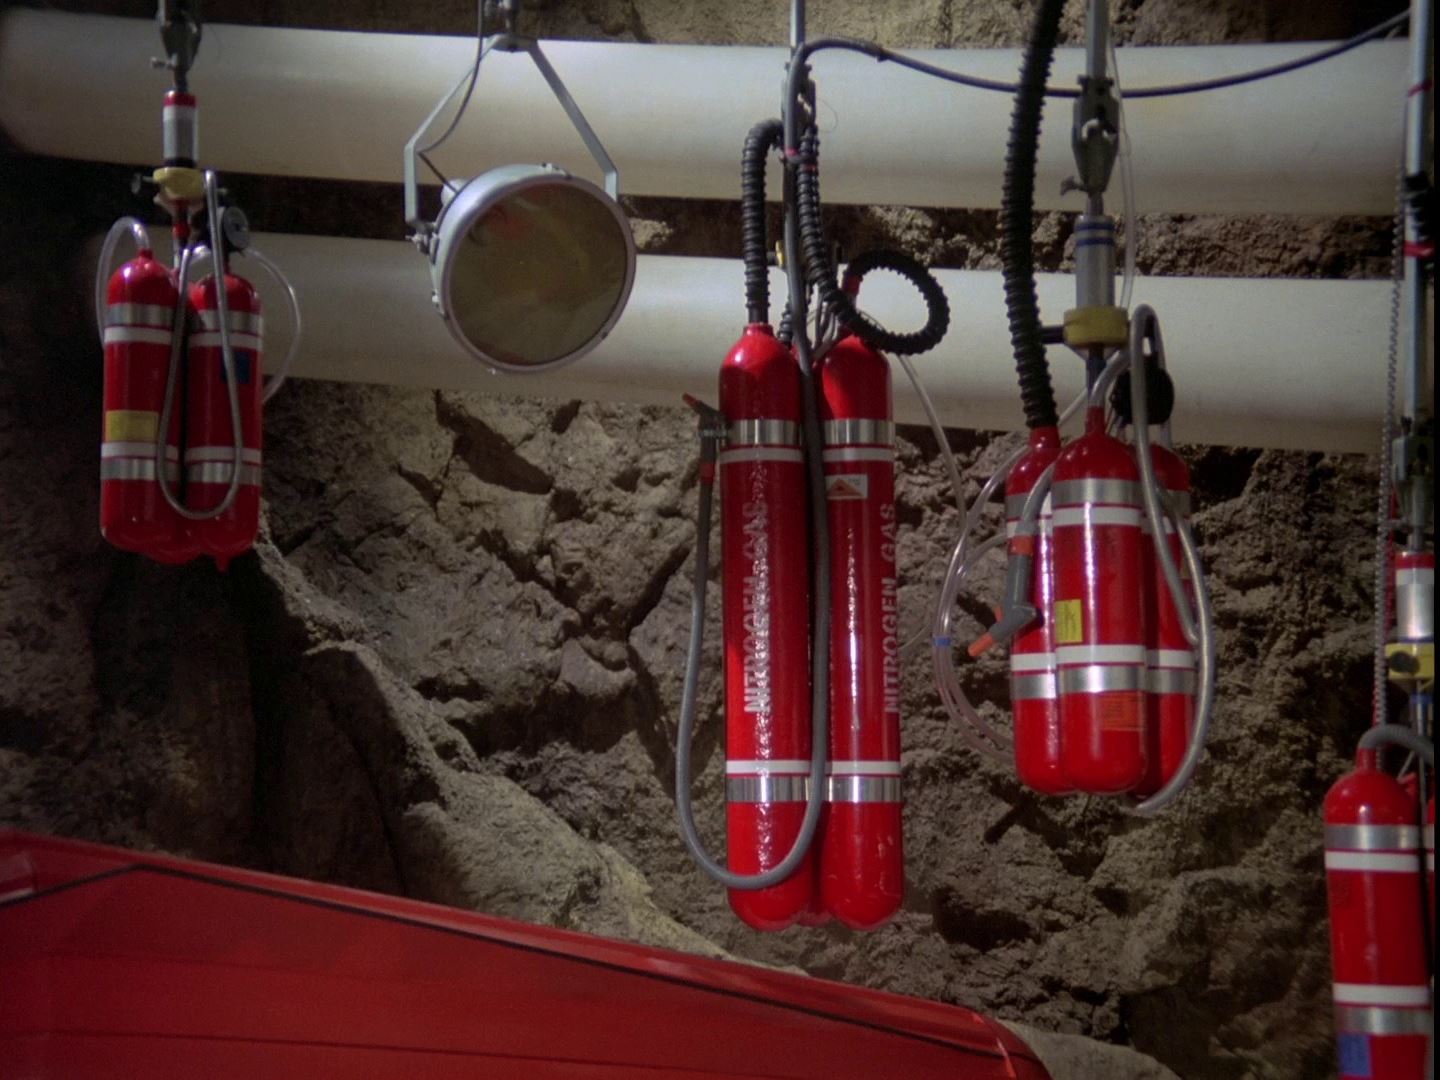
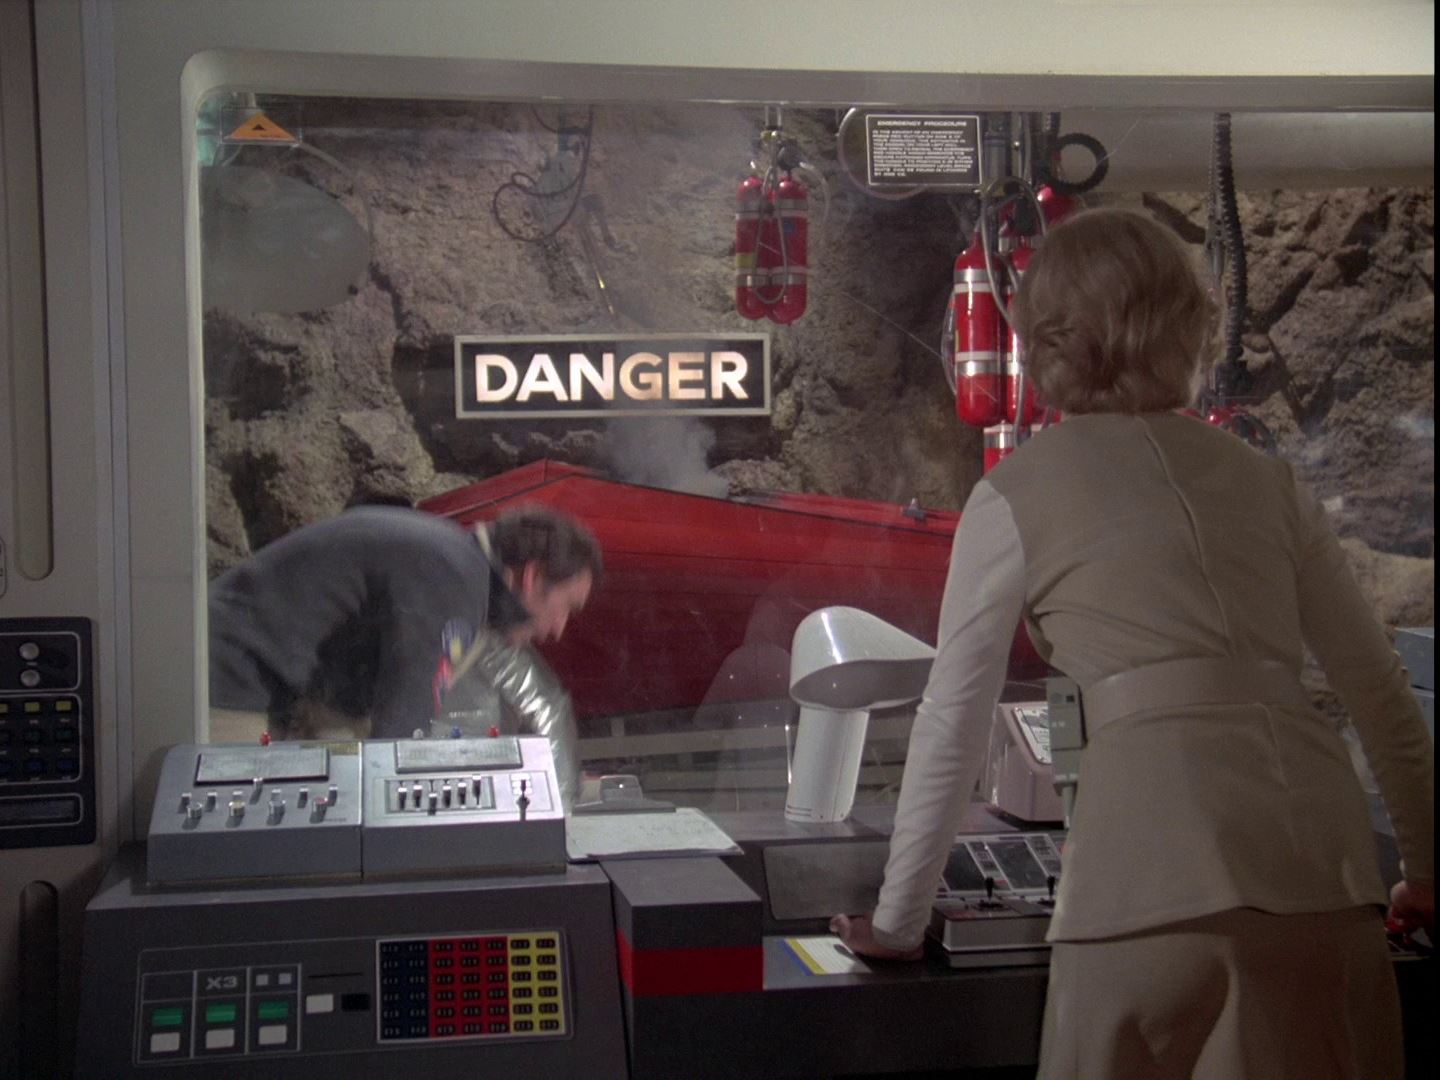
A large underground cavern serves as the main area into which foreign objects are brought for study. The cavern appears to be natural rather than carved out, although a smooth floor with a rail system has been fitted. Cranes, an industrial laser and lights are installed overhead, and a plethora of 'DANGER' signs adorn the walls. Off in one corner is a yellow storage bin of the type that appeared in Nuclear Disposal Area 2.

A mid-sized observation/laboratory annex adjoins this staging/exam area, and is sealable from the cavern. (There is only one door into and out of this annex, though, so it becomes something of a trap if it has to be sealed!)
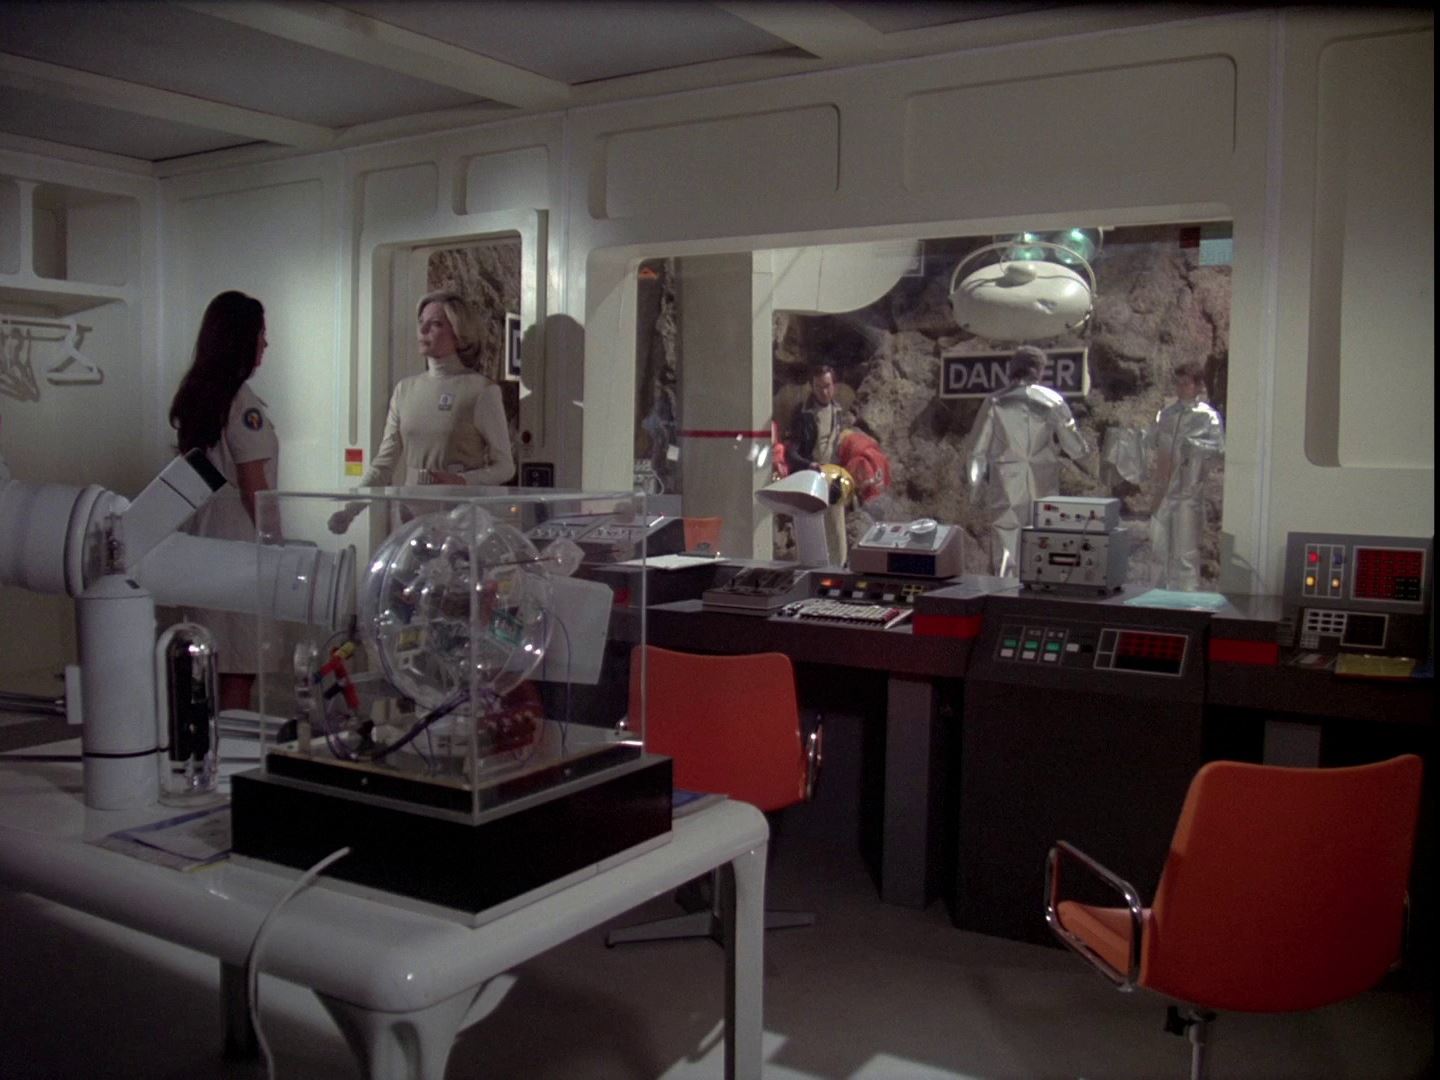
Although I never quite cared for the 'Bat Cave' aspect of the main part of the facility, especially because of its earthy brown colouration (the rest of the lunar sets had always been an appropriate darkish grey) and over-use of 'DANGER' signs, I thought that the annex area was rather neat, and looks like a Series 1 set. It even has the distinctive white Sorella lamps atop the desks, an almost trademark feature that nearly completely disappeared between the seasons.
Presented here are plans of that research lab annex, as aired in Series 2. As always, I have utilized in my plans wall panels originally created by Roberto Baldassari, although I have modified many of them to more accurately reflect the actual studio sets. (Baldassari imagery hosted at The Catacombs)
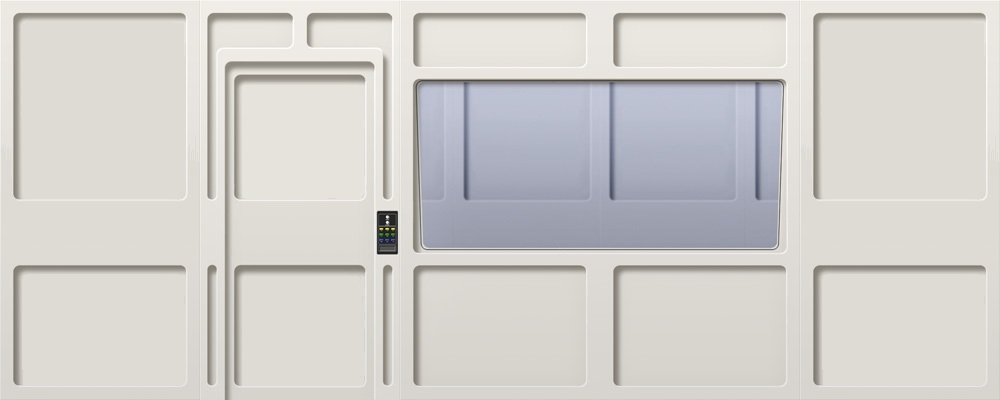
First, the exterior of the observation annex:
It is essentially a two-level wall to accommodate the large staging area cavern. The doorway has no lower lip as seen on some Alphan doors; presumably this would allow easy access of equipment carts and trolleys into and out of the annex.
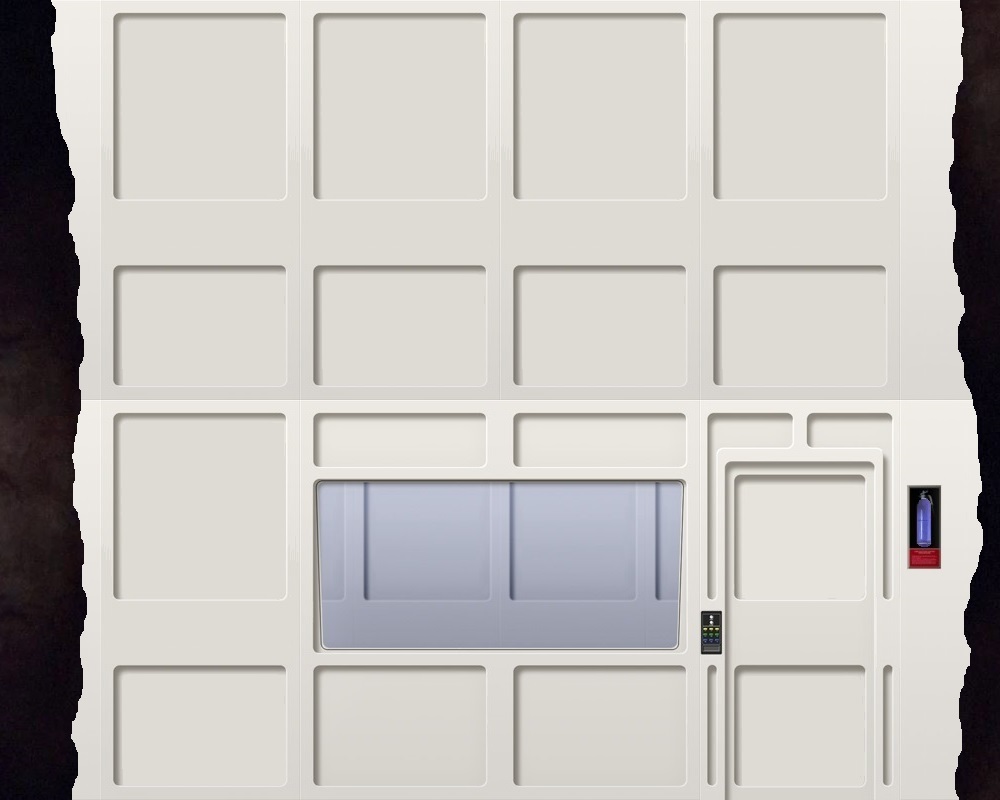
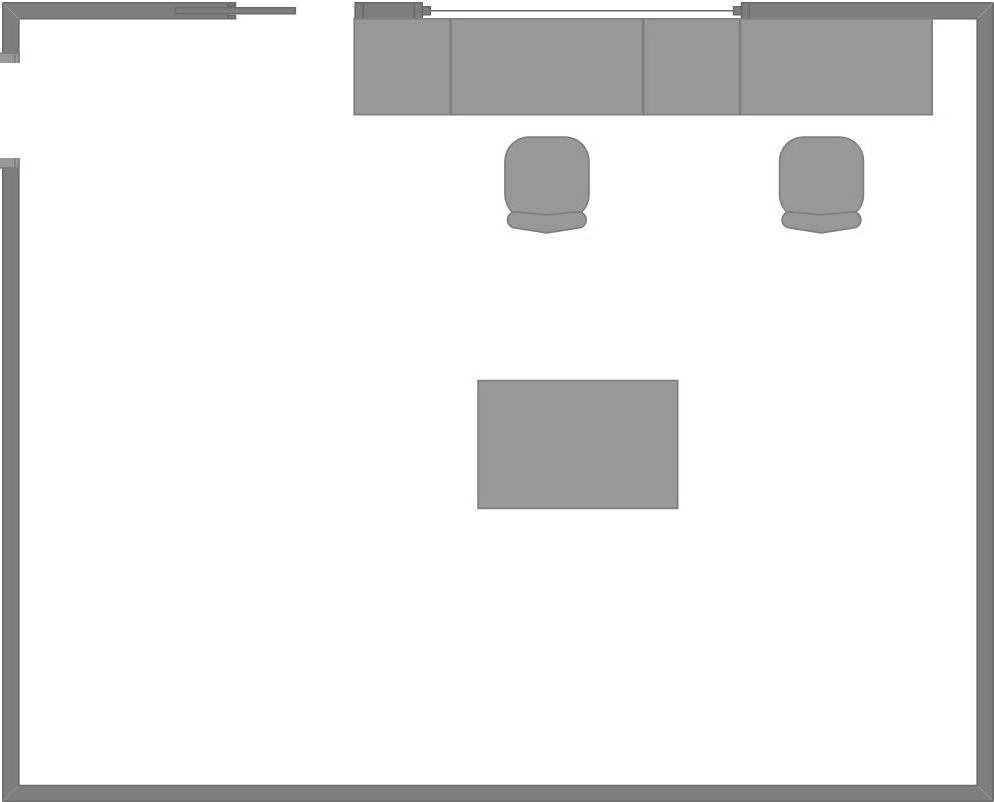
Next, the interior wall plans, starting with the main entry and observation wall:
From this view, the door slides into the wall panel at left when opening. The actual studio view through the window would show the cavern rather than interior Alpha wall panels.
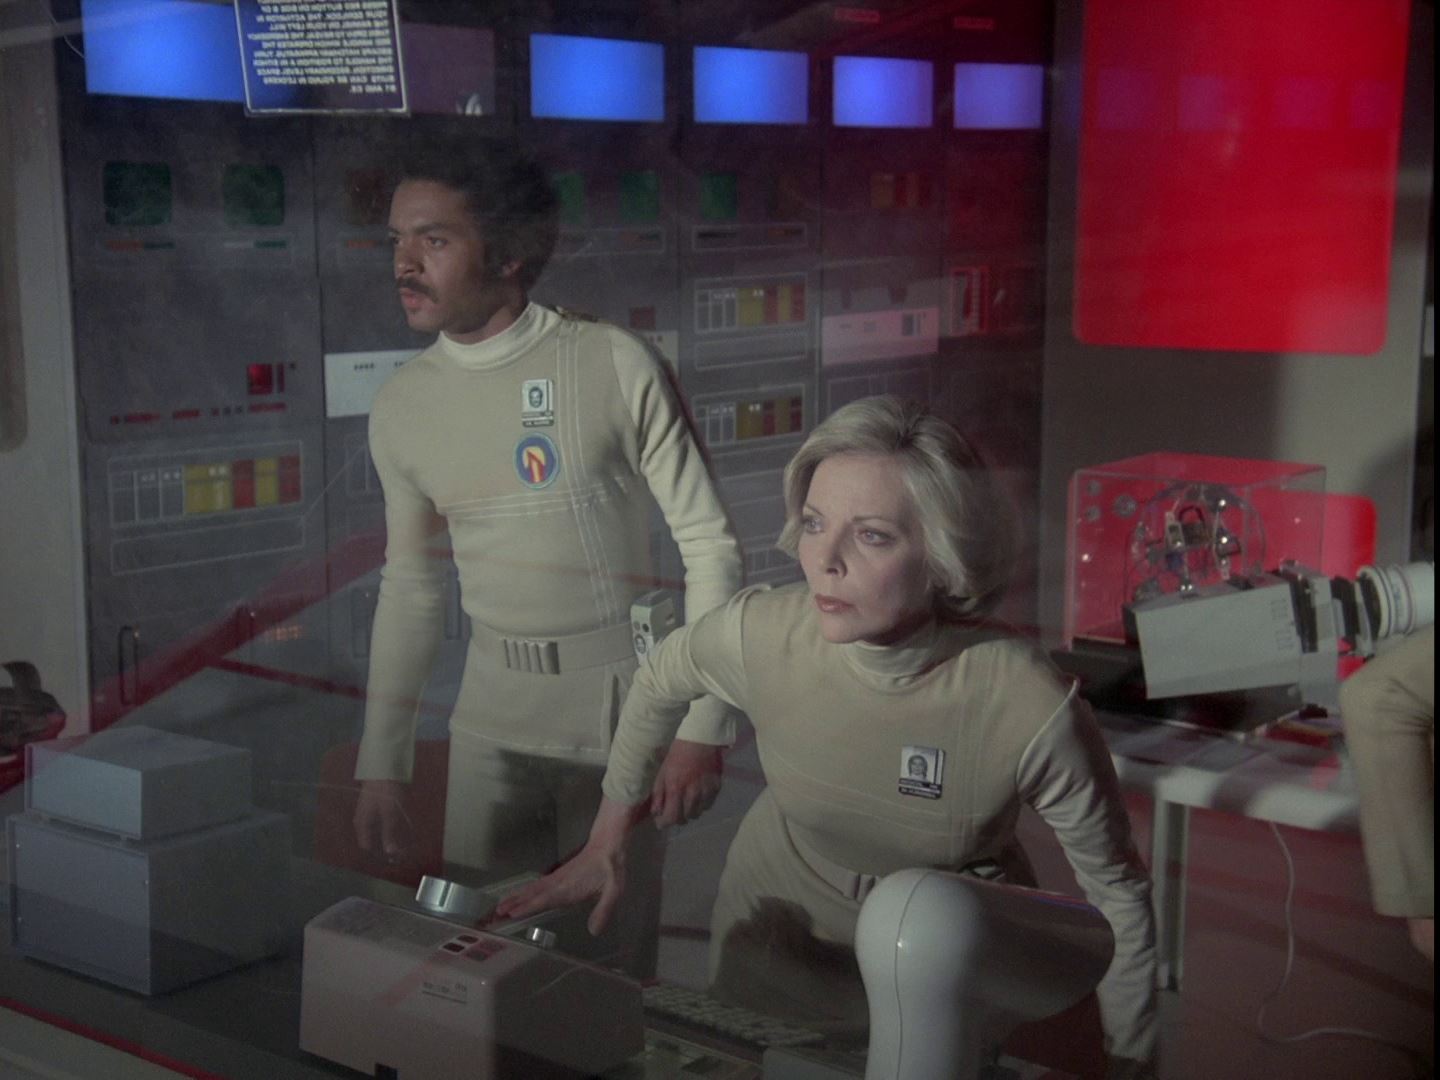
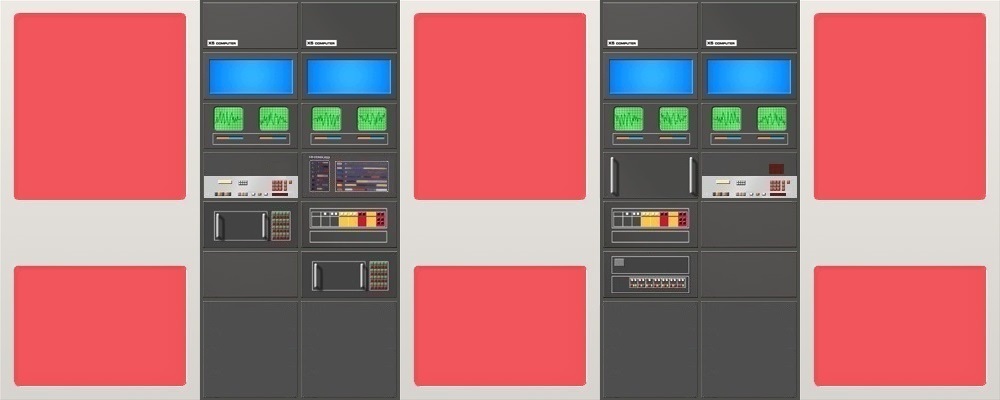
Turning clockwise from the window, we see the first computer wall:
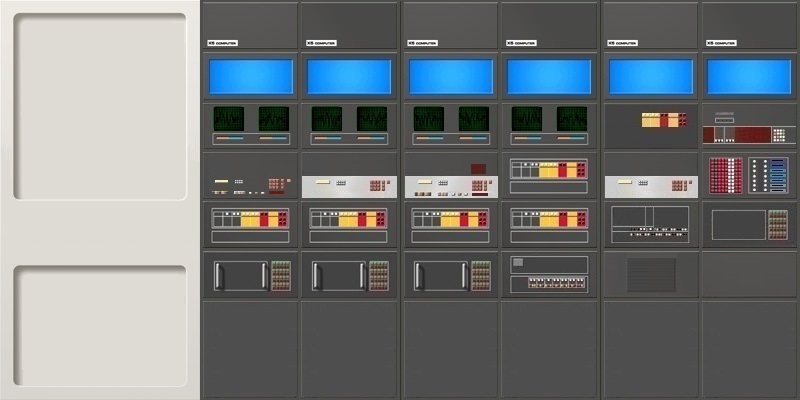
Although utilizing individual computer panels from Series 1, the 'racks' into which the panel covers are set are not light grey plastic or metal as they were in Series 1, but rather are a dark grey similar to the panel covers themselves.
Interestingly, the bottom row of panels are double-height, similar to the bottom panels of the moonbase monitors below the big screen in Series 1's in Main Mission. There do not appear to be any vents in these larger flat panels, though there are numerous tables and people blocking a clear view. Also, the view showing these panels is through the observation window from the cavern area, and reflections on the window glass also prevent a clear view. (I have kept these double-high panels consistent throughout all the wall plans, even though they are only visible on this wall.)
Note that in the rightmost column of panels, the panel between the blue light and the keypad panel may not be accurate; it could have been a flat panel with reflected red light from the back wall. Also, the single flat panel just above the double-high panel was unobservable on screen.
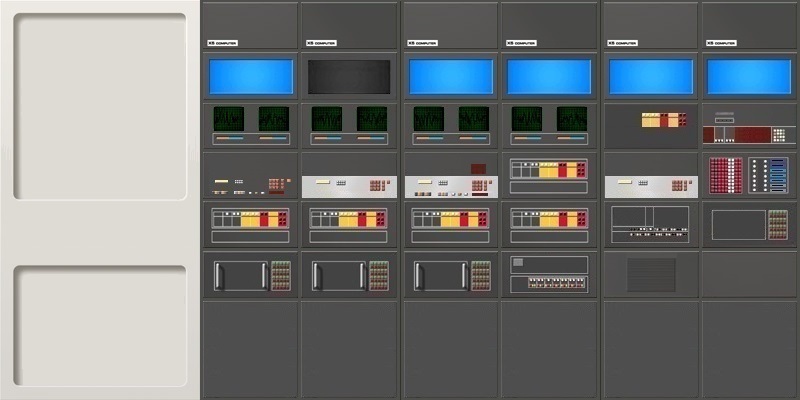
During the course of the episode, one of the blue lights along the top of the wall is no longer illuminated.
Turning clockwise again toward the room's back wall, we see a series of alternating light panels and computer panels.
In this wall plan, plain flat panels shown were not visible on screen, being blocked by tables and equipment and the window frame and/or door frame.
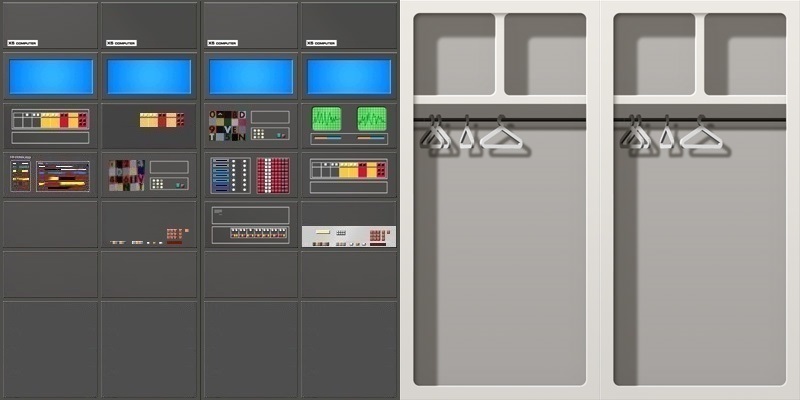
Turning clockwise once again, we see the final wall in the annex. A cupboard/closet is near the door for storing lab coats and coveralls, and another computer wall panel is at the back corner. Note that on the leftmost bank of computers, the flat panels shown actually DO appear flat on screen.
This one has a lot of conjecture for the middle two panels, as they are almost completely blocked from view on screen; only the leftmost top panels (the 'X5 COMPUTER' one and the blue light immediately below it) are visible on screen, and then only for a moment as the door opens and people block the view.
I have made some variants to cover what may be present on the set.

The first is a computer wall that makes basic symmetry with the opposite wall.
The second variant replaces the completely unseen panel with a 'wall screen' type visible in other Alphan labs (Breakaway Flight Control and the nuclear generating areas in Force of Life and Alpha Child) and the Command Office and commander's living quarters.
I presumed this might be here because this room does NOT contain a communications post, and the wall screen would serve that function.
Finally, there may be a second cupboard/closet unit.
When Koenig and company enter the annex, some staff members take their spacesuits from them. The spacesuits get stowed... somewhere other than the rightmost unit closest to the entry doorway. Since they are not later observed draped across a tabletop or desk, one must assume that the suits are hanging inside another cupboard. Outside of a continuity error, this explains the 'disappearing' spacesuits quite nicely. Furthermore, a double-cupboard arrangement is seen throughout Series 2 in the Alphan living quarters, so such an arrangement here is not without precedent.
Although I don't like losing the wall screen, it seems that this last arrangement is most likely how the set was actually constructed.
|
||
 |
 |
|
|
Copyright Craig Rohloff